Using pass & git For Password Management
Moving Away From Bitwarden
I’ve been on the fence about moving away from Bitwarden, and today for no reason I’m finally making the move. The reasons for this are the same reasons why anyone should consider an internally controlled solution:
- Your passes are your most valuable asset. You shouldn’t trust anyone else with them for any reason.
- Bitwarden fired their VP of cybersecurity for choosing “Assigned by God” as their pronouns
- This one is obviously more or less contentious given your personal beliefs. For me I think it’s petty and stupid, and not the kind of thing I want to see my password manager doing.
Anyways, because of this, it made me realize that I really need to move to the tried and true method of using git, pass, and gpg together. I should be my own backbone, plus I don’t have to worry about myself making moves against my own best interests. Well, that’s not true, but this method is one that should stand the test of time.
The goals for this password solution are:
- Cross platform
- I do have to be able to grab these passes on devices like a phone. I use Graphene so this shouldn’t be too hard to do, but YMMV if you use iOs or are not familiar with termux.
- This also means I want my same passwords that I put into this on headless machines, IE for “password eval” commands for programs like Newsboat.
- Handled through git
- I’ve become a large believer in using git to manage almost everything, from backing up work notes across devices to managing my backups with git-annex.
- This also means I can use a self hosted gittea instance behind wireguard to synchronize my repo from anywhere TO anywhere!
The Process
flowchart TD
	subgraph "Phase 1"
		A0[Install Prereqs] --> A1[Make GPG Key] --> A2[Init pass]
	end
	subgraph "Phase 2"
		B0[Insert First Pass] --> B1[Init gittea repo]
		B1 --> B2[Add SSH Key to gittea]
		B2 --> B3[Add gittea remote url]
		B3 --> B4[Push to remote]
	end
	subgraph "Phase 3"
		C0[Export GPG Key] --> C1[Add GPG Key To Phone]
		C1[Install pass on phone] --> C2[Done!]
	end
	A2 --> B0
	B4 --> C0
Step By Step
I’ll be using debian, but the only steps that should affect are installing prerequisites.
Phase 1
Install Prereqs
$ sudo apt update && sudo apt -y install pass git gnupg
It’s that simple!
Create GPG Key
I want to explain this step clearly. I had a lot of difficulty wrapping my head around how I make & associate with this key, so I’ll go into detail about it here. Up to date instructions Can be found here on Githubs docs but I’m still going to reiterate them here to explain important variables.
$ gpg --default-new-key-algo rsa4096 --gen-key
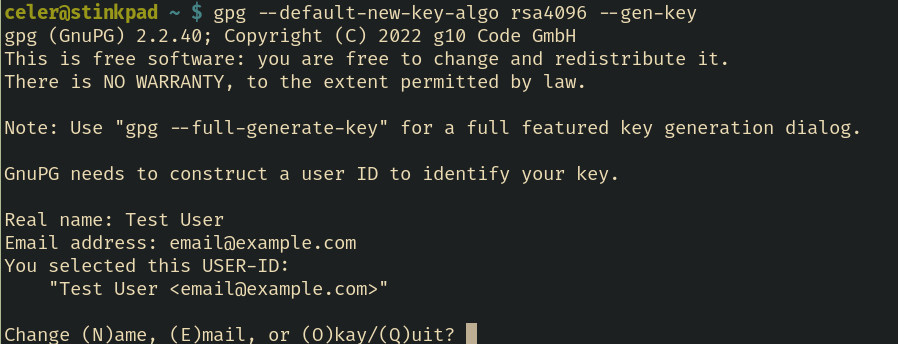
It will ask you for both a real name and an email. this is how you refer to your gpg key - either it’s real name, or it’s email. What I mean by this is, when you run the pass init, you refer to the gpg key itself by name. Which is the next step.
Pass Init
$ pass init "Test User"
$ pass init [email protected]
“Test User” would be the first / last name you gave your GPG key. It could ALSO be the email as shown. What this does is create a folder in your home directory called .password-store, where all your future passes wlil be stored as gpg encrypted files.
Phase 2
Add your first pass
$ pass insert test/examplelogin
mkdir: created directory '/home/celer/.password-store/test'
Enter password for test/examplelogin:
Retype password for test/examplelogin:
[main xxxxx] Add given password for test/examplelogin to store.
 1 file changed, 0 insertions(+), 0 deletions(-)
 create mode 100644 test/examplelogin.gpg
If you’re unfamiliar with git a lot of this output may seem unfamiliar to you, but it’s nothing too complicated. The step by step play is this
- A directory is created (if it doesn’t exist) for your login file
- You enter the password for said file twice
- The file is added to your git repo and committed with an auto message from pass itself.
To test if it worked, use pass show
$ pass show test/examplelogin
password
This should ask you for the password you set for your GPG key in the first phase. Once you enter it, it shows the pass.
Init gitea repo
You don’t have to use Gitea, but I highly highly highly recommend against uploading your passwords to github.com even in a private repo. The entire premise of a setup like this is to have total control over where your passwords are stored. The second you use github you are breaching this.
You can use any self hosted git forge, or if you’re savvy enough any remote git repo, but for the guide I use Gittea.
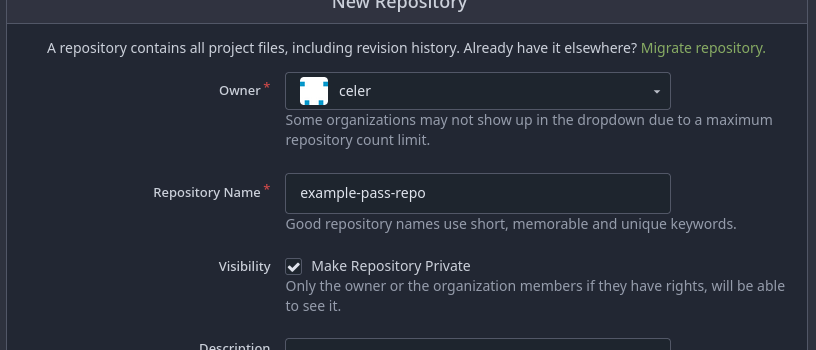
Simply create a new repo.
Add SSH Key To Forge
Before adding your repository remote url, you should add your SSH key to gitea/your forge. This will make pushing and pulling your password store safer & easier in general. If you already have added your SSH key to your forge, you do not have to do this.
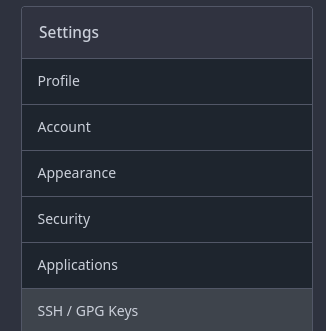
You do this under Settings in gitea as pictured above.
Add Gitea Remote URL
Now we can finally add our remote URL to pass. The default commands to do this from gitea say something like this:
git remote add origin ssh://[email protected]:2222/user/example-pass-repo.git
git push -u origin main
Note that we’re using the ssh:// url, which is why we added the SSH key in the first place. We have to modify the default commands that it gives you slightly - barely, in fact. In our above example, the modified commands would be this
pass git remote add origin ssh://[email protected]:2222/user/example-pass-repo.git
pass git push -u origin main
Just add pass in front of git - that’s it! Now every time you want to sync your changes to and from your password store repo, you can run the following commands
pass git fetch
pass git pull
pass git push
To get new updates, save new updates to disk, and push updates to the main repo respectively.
Phase 3
Export GPG Key
In case you haven’t made the connection by now, your password-store is directly linked to your gpg key identity (Remember Test User or [email protected]). You’re going to need to export this and import it to every device you plan on using the password store on. From phones to other servers.
To export a key, just run the following command:
$ gpg --output keyname.pgp --armor --export "Test User"
$ gpg --output keyname.pgp --armor --export "[email protected]"
Add GPG Key To Other Device
There’s a mlilion ways to do this. I like to imagine that scp is the best tool for the job considering we’re transferring one file to another host.
$ scp keyname.pgp [email protected]:/home/uesrname
Then, on the computer receiving the key, run the following command
$ gpg --import keyname.pgp
Preparing Phone Environment
This is where we get into the phone setup (Specifically, Android). If you don’t care about that, or don’t use Android, then congratulations - you have a password store controlled via git! Just share your key around to devices as needed.
If you need to figure out how to get the password-store to work on your (Android) phone, then the steps below are for you. You are going to run into a few caveats trying to set everything up with the password-store app itself. I found it was MUCH easier to set up the repo inside of termux itself, then just sharing that directory to the password-store app.
Part 1 - Termux
$ pkg install git pass gnupg openssh-server
$ gpg --import keyname.pgp
$ ssh-keygen && cat ~/.ssh/id_rsa.pub # If you haven't already set up SSH key authentication on termux, this is how you generate the key to add to gitea.
$ git clone ssh://git@yourgiteainstance:2222:/username/your-password-store.git ~/.password-store
The above steps do the following:
- Install prereqs (git, pass, and gnupg)
- Import the gpg key shared to your device earlier
- Generate SSH key and add it to Gitea (if you haven’t already)
- Clone your password repo to the directory
~/.password-store- Your username is going to be something weird on Termux, the ~ mitigates the worry of this
Part 2 - App
We’re in the home stretch - simply follow these steps.
- Go to app settings
- Check the box “Select external repository”
- Click “Select external repository”
- Click on “Termux” on the left as a file source
- Show hidden files
- Select the
.password-storedirectory
Conclusion
This is not feature complete - inserting OTP secrets isn’t covered at all in this guide. That will probably be a future guide, it’s a lot more easy in general. I just want to make a more elegant solution before sharing it with the world. I hope that this article has inspired you to consider taking control of your own passwords and how they are shared!